
9 Smart Ways to Lower Your Winter Heating Bill Before the Cold Arrives
Heating costs make up a large share of the average home’s winter utility bill, and a lot of that expense comes down to heat escaping through gaps, thin insulation, and an overworked furnace. The good news is that most of the fixes below are inexpensive and can be done in a single weekend, well before the coldest weather sets in. Tackle these now, while it’s still comfortable to work outside and around open windows, and you’ll feel the difference on your bill by December.
Find and Seal Air Leaks First
Before you spend money on anything else, find where your home is actually losing air. Common leak points include window and door frames, electrical outlets on exterior walls, the attic hatch, recessed lighting, and where pipes or cables pass through walls. On a cool, breezy day, hold your hand near these spots to feel for drafts. Seal gaps around trim and utility penetrations with caulk, and use foam gaskets behind outlet covers on exterior walls — they cost only a few dollars and take minutes to install.
Upgrade Weatherstripping on Doors and Windows
Weatherstripping compresses and wears out over time. If you can see daylight around a closed door or feel air moving around a window sash, it’s time to replace it. Self-adhesive foam or V-strip weatherstripping is inexpensive and simple to install, and a well-sealed door alone can make a noticeably drafty room feel comfortable again.
Add Insulation Where It’s Thin
Attics are the single biggest area where homes lose heat, since warm air naturally rises. If your attic insulation looks patchy, compressed, or is level with (or below) the ceiling joists, it’s likely underinsulated for your climate. Adding a layer of blown-in or batt insulation is one of the most cost-effective upgrades a homeowner can make, and many utility companies offer rebates that offset part of the cost. If you’re not comfortable working in a tight attic space, or the space has knob-and-tube wiring or other electrical concerns, hire an insulation contractor rather than DIYing it.
Get a Professional HVAC Tune-Up
A furnace or heat pump that hasn’t been serviced runs less efficiently and is more likely to fail when you need it most. Schedule a licensed technician to inspect the system, clean components, check refrigerant levels (for heat pumps), and confirm everything is operating safely before the heating season starts. Never attempt to service the gas or electrical components of a furnace yourself — this is one job that belongs to a licensed professional.
Replace Your Furnace Filter and Keep a Schedule
A dirty filter restricts airflow, forcing your system to work harder and use more energy to move the same amount of heat. Check your filter monthly during heavy-use months and replace it roughly every one to three months, depending on the filter type and whether you have pets. Set a phone reminder if this is easy to forget.
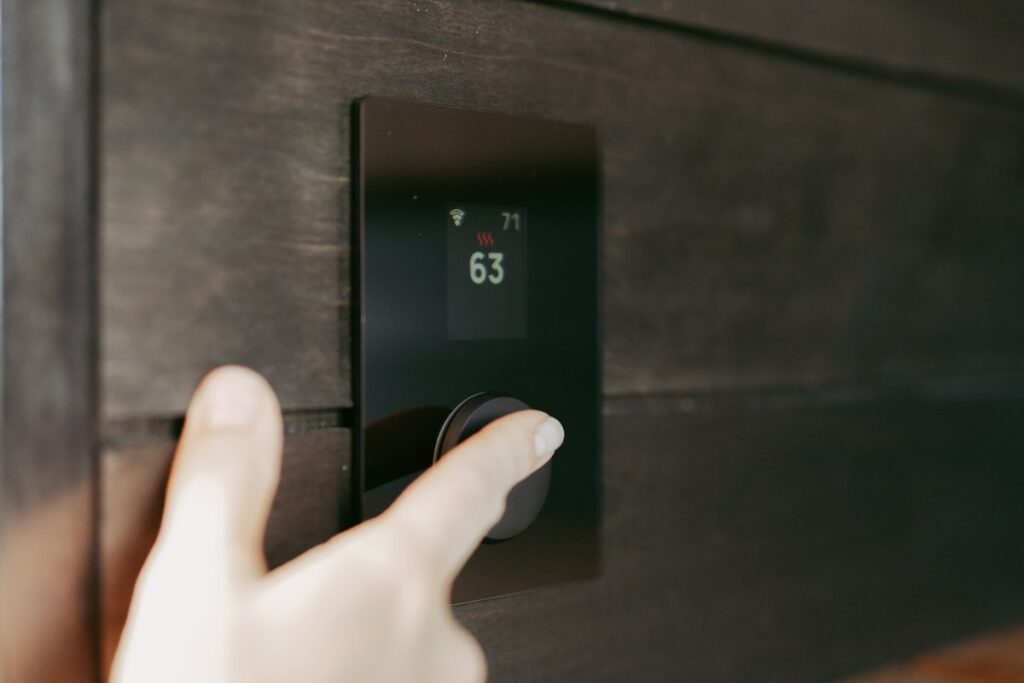
Install a Programmable or Smart Thermostat
Manually remembering to lower the heat before bed or when you leave for work is easy to forget. A programmable or smart thermostat automates it, typically saving energy by scheduling a lower temperature during sleeping hours and when the house is empty, then warming back up before you need it. Even a modest, consistent setback of a few degrees adds up meaningfully over an entire winter.
Let the Sun Do Some of the Work
Open curtains and blinds on south-facing windows during the day to let in free solar heat, then close them at night to add an extra layer of insulation against the glass. This costs nothing and can make a real difference in how hard your heating system has to work on sunny winter days.
Reverse Your Ceiling Fans
Most ceiling fans have a small switch that reverses the blade direction. In winter, running the fan clockwise on a low setting pulls cool air up and pushes the warm air that has risen to the ceiling back down into the room, without creating the cooling breeze you’d want in summer. It’s a free adjustment that helps distribute heat more evenly.
Insulate Your Water Heater and Pipes
If your water heater feels warm to the touch, it’s losing heat to the surrounding air, and your unit has to run more to compensate. An insulating jacket (sized correctly for your water heater type) and pipe insulation sleeves on exposed hot water lines are both inexpensive and easy to install, and they reduce standby heat loss. Just be sure to leave the thermostat, burner access panel, and any pressure relief valve uncovered and accessible, and follow the manufacturer’s guidance for gas versus electric units.
Quick Recap
- Seal air leaks around trim, outlets, and penetrations
- Replace worn weatherstripping on doors and windows
- Add insulation in the attic where it’s thin
- Schedule a professional HVAC tune-up
- Replace the furnace filter on a regular schedule
- Install a programmable or smart thermostat
- Use sunlight and curtains to your advantage
- Reverse ceiling fans to run clockwise in winter
- Insulate the water heater and exposed hot water pipes
None of these projects require major renovation, and most can be done for well under a few hundred dollars combined. Start with the free and cheap fixes — sealing leaks, adjusting fans, opening curtains — then layer in the bigger-ticket items like attic insulation and a smart thermostat as your budget allows. Your furnace, and your wallet, will thank you once winter actually arrives.
For complex structural, electrical, gas, and other safety-critical work, consult a qualified professional and check local requirements.
Read Next
All articles →
9 Weatherproofing Upgrades to Lower Your Heating Bill This Winter
9 Weatherproofing Upgrades to Lower Your Heating Bill This Winter
Read the guide →9 Simple Ways to Weatherproof Your Home Before Winter Hits
9 Simple Ways to Weatherproof Your Home Before Winter Hits
Read the guide →
The Essential Fall Home Maintenance Checklist: 12 Tasks to Complete Before the Weather Turns
The Essential Fall Home Maintenance Checklist: 12 Tasks to Complete Before the Weather Turns
Read the guide →